
The Adventures of Dehydrating Meyer Lemons

Welcome culinary enthusiasts and lovers of all things citrus! Today we’re going to explore how to dehydrate Meyer lemons, save the juice and create lemon zest - so you can preserve these citrusy wonders for use all year long. Cue the dramatic music please!
Health Benefits
First, let’s take a look at all the health benefits of these yellow beauties. Meyer lemons are high in vitamin C, folate and phytonutrients that have antioxidant and anticancer properties. Meyer lemons also are a good source of potassium and magnesium. And we all know that citrus is an important component of the super popular Mediterranean Diet.

What Makes a Meyer Lemon Different?
Meyer lemons are different from regular lemons - the most common varieties of which are Eureka or Lisbon lemons. Meyer lemons are smaller than regular lemons and have thinner skins. They are also less acidic than regular lemons and have a sweeter taste.
Meyer lemons were introduce in the United States in the early 20th century by Frank Meyer - after whom these lemons were named. They are thought to be a cross between a regular lemon and a mandarin orange, and have deep yellow to orange skin with dark yellow pulp. The rinds of Meyer lemons have more flavor than those of regular lemons - which is why they are perfect for dehydrating and making lemon zest!

How to Begin
First, gather your lemons. In Zone 7b, Meyer lemons usually begin to ripen in late November. Since Meyer lemons are much more thin-skinned than regular lemons, peeling them for their rinds is super easy. Just cut them in half and peel them like you would an orange. The pith is usually very minimal and doesn’t need to be removed.

Cut the Rinds into Small Pieces
After you finish peeling all your lemons, cut the rinds into smaller pieces. This will help them lay flat in your dehydrator and reduce the drying time. Set the rinds aside.

Juice the Lemons
Since Meyer lemons are so much sweeter than regular lemons, their juice is perfect for using in pesto, pies, salad dressings or anything else that needs a bright citrusy lift. Like pasta sauce - really!
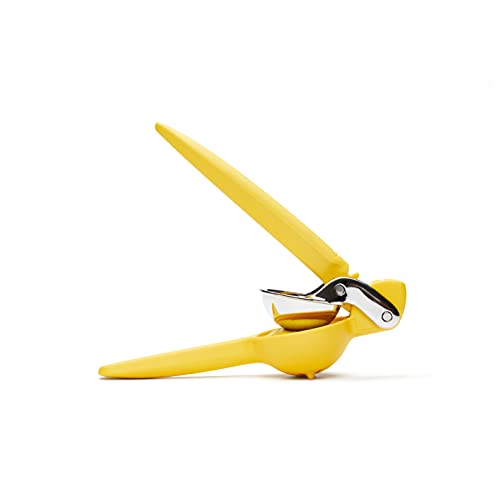

Here are 2 products that are lifesavers when you’re juicing your Meyer lemons. The first is a citrus juicer. It doesn’t have to be a fancy one, and a juicer like this (be sure the main parts are metal) makes squeezing all your lemons super easy.
The second thing you need is a way to collect and save the juice for use later. These cute little silicone ice cube molds (with lids) are ideal. Each cube is about an ounce - which is the perfect amount to add to your favorite recipes.

Fire Up the Dehydrator
My dehydrator is a life saver. Everything goes into it - all my herbs, Chile peppers and garlic - even homemade dog biscuits!
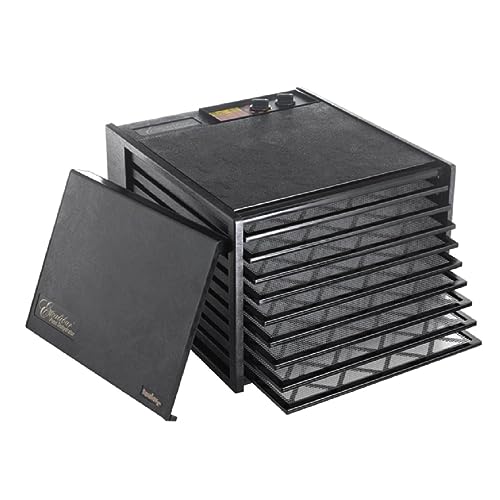
This is the one I use - it’s an Excalibur electric dehydrator. I’ve tried several and this one is the bomb! There are 9 trays, an adjustable thermostat with a wide temperature range, a timer and an auto shut off.
So grab those sliced lemon rinds you set aside later and lay them out in single layer rows on the trays, leaving enough space around them for good air circulation. They’ll kind of look like vibrant yellow army guys preparing for battle.
Next, set the temperature control to a really low setting - around 100 to 105 degrees - no hotter! Set the timer to 10 hours and get ready for your kitchen to be transformed into a citrus-scented oasis.
It takes about 24 hours total for my lemon rinds to completely dehydrate in my Excalibur dehydrator. After 10 hours I take a quick peek and then reset the timer for another 10 hours. When time is up, I’ll check again and then reset the timer one more time - this time for about 4 hours. Depending on the dehydrator you’re using, your lemon rinds may need more hours to become completely dehydrated. You’ll know when they’re dry when you can crack them in half - they’ll snap and won’t be bendy.

Time to Pulverize
Once your lemon rinds are completely dry, it’s time to turn them into that lemony, zesty powder that we’ve been waiting hours for . . . literally. I’ve found that turning this step into a 2-step process works best.

Step 1:
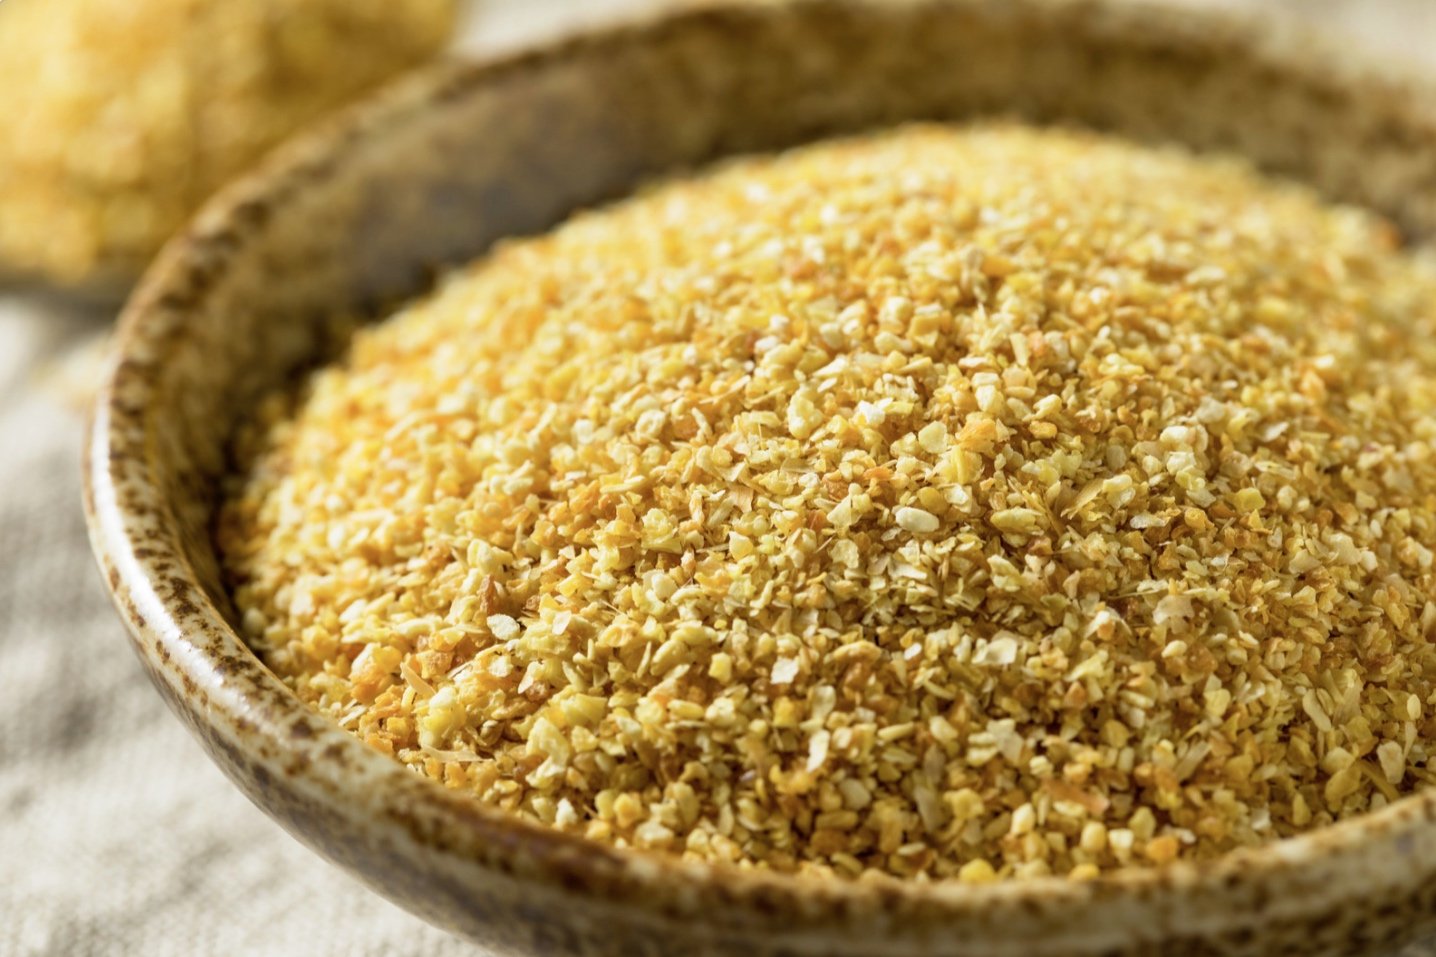
First, use a food processor or blender to grind your lemon rinds into a coarse mix that looks a lot like grainy sand. I’ve found that my mini food processor is the perfect size. Grind your lemon rinds in small batches for the best result. And feel free to leave your ground lemon rinds like this if you want more of a granulated zest.
Step 2:
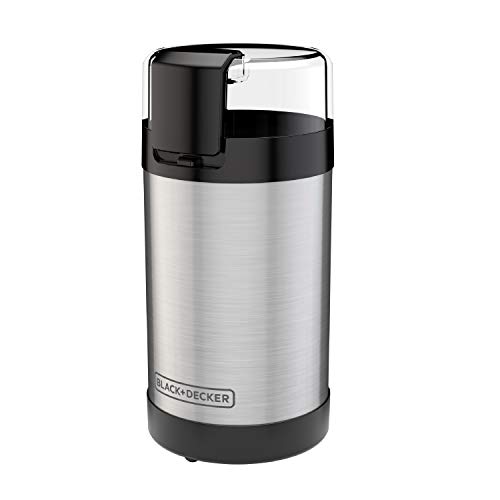
If you want a finer zest, use a coffee grinder for the second step - and pulverize away! Using a coffee grinder will produce a finer, fluffier zest.

Store Your Stash
Transfer your vibrant, concentrated Meyer lemon zest into an air-tight glass jar and store it in a cool, dry place. Or store your zest in the freezer - just be sure to seal the jar after each use. Moisture and humidity are definite enemies and can wreak havoc with your zesty treasures! But properly stored Meyer lemon zest can last more than a year - unless you use it all before then - LOL.

Now You Know the Secret
Dehydrating Meyer lemons isn’t just about preserving them. It’s about unlocking their full potential. And it isn’t just a process - it’s a culinary adventure that results in releasing the citrusy magic of these little lemony beauties. And it gives you fresh, zesty flavor that’s like a burst of sunshine in your mouth!
I hope you liked this dehydration journey featuring the Meyer lemon. Join my email list below for more culinary ideas and inspiration. Let’s zest up your life!